Tuesday, March 31, 2015

Going Batty


I have a whole bin of batting pieces leftover from previous quilts. I've never had the heart to throw them away so I dug these out and decided to measure and label them for future use.


I even had enough pieces to make batting for 2 twin size quilts after fusing them together! To do that, I used 2.5" strips of lightweight fusible interfacing to butt and join the seams together.


Carefully butt the seams together so there is no ridge. You do not want a bump to show through your quilt where you joined these units together. While pressing I ALWAYS use a pressing cloth so not to melt the batting on the faceplate of my iron. Yuck! What a mess that would make! 


 You can also run a long stitch to add more strength but it is not necessary if you are careful handling the completed sheet. I used dark thread in this example to show the stitches I used. Keep your tension on the light side so not to buckle the seam. Again, you do not want this to show through your quilt.


Now you can make yourself a "freebie" from leftover batting pieces, and feel very proud that you did not add to the mountain of landfills! Let's dance!


One two three, spread out the cape
One two three, twirl round the floor
One two three, left foot you swing
One two three, then start to sing
One two three, loud as you please
One two three, counting with ease
One two three, doing the batty bat
Batty batty bat batty bat batty bat batty bat
One two three count
Batty batty bat batty bat batty bat batty bat
Won't you dance with me doing the batty bat?


https://www.youtube.com/watch?v=ubrqYu_XVW0


#7 UFO Number Game

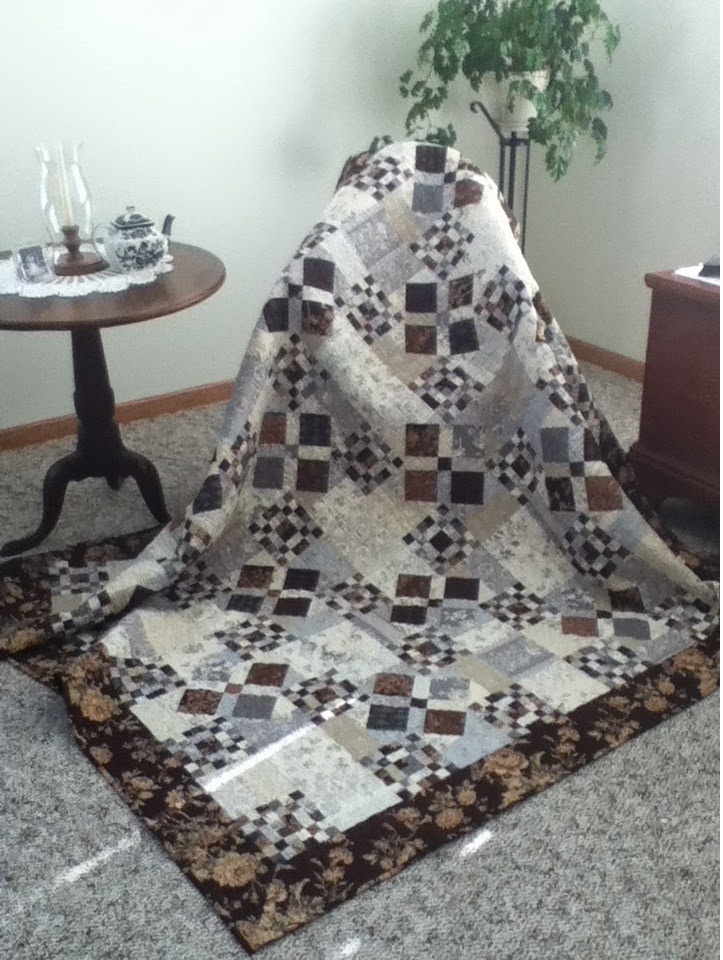
Numbers are randomly chosen from our list of UnFinished Objects (UFOs) on StashBuster's to drive up the desire to finish a project that may be set aside and forgotten. The month of February, my Scrappy Churn Dash blocks were my number 7 (no, my list is not according to importance). I wish I took an original picture of these blocks before ripping them apart. They were connected in rows together and they had no visual appeal at all. I had purchased these on ebay with the thought of taking them apart for a new setting which is what I did. I am such a sucker for rescuing older quilt tops and making them into something new. I really love the challenge.


These blocks were pretty wonky and uneven so a lot of points and meeting of seams were cut off while squaring them up. I would rather have a flat quilt. At least on a utilitarian quilt like this one. 


I set them diagonally with 9-square cornerstones in the sashings. 


And the final result was a nice size quilt top.


I pieced some larger pieces of fabric for the backing and it is now hanging and ready to be quilted. Yay! What is this? My number 7 is also my 5th project completed! Well, my 5th quilt top anyway.

Monday, February 23, 2015

Another Flimsie and a Finish!

    An acronym for STASH was recently shared on stashbusters. Special Treasures All Secretly Hidden. How delightful and endearing! I feel like posting this on a sign in my sewing room but then it wouldn't be a secret anymore so we will just keep it to ourselves.

My Attempt with the Jelly Roll 1600

     I've still been working on diminishing the juvenile prints stash. I thought the perfect project that would not generate more scraps is the Jelly Roll 1600. (Google for many tutorials) And what a wonderful  project to blow out the carbon in your old sewing machine you have in storage. I have several machines and it is good to get them out and use them on the occasion such as this. My workhorse, and beloved Bernina 830, never missed a stitch allthough I did have to stop and rewind 2 bobbins for her.


     So I just cut up what juvenile scraps I had left into 2.5 strips. Some of the strips were not 42", so I used 65 strips (instead of the required 40). This little technique of sewing these long strips together was really fun to see how things would match up. The only problem was that I had to stop at the size of 65" x 82" (see picture at right). If I cut it into one more half it would finish at 41" x 130" and what would I do with that? And I really did not care for the vertical stripes...

     Thinking this through I came up with the idea to cut them into 11" strips, and add 4" panels between.  These 11" sections were not quite long enough so with the remaining strips I had, I added 9 more rows to each section making them 83" long. I then added 4" borders and am now considering this one DONE at 64" x 91"! Much better, don't you think?  

     I STILL have some remaining scraps left but have boxed them away for a while. Enough with these brights already! Maybe in a year or two I'll drag them out again. Once the backing fabric comes in for these last three kiddie quilts, I'll be taking these to the machine quilter to finish. 


Maple Leaf Quilt

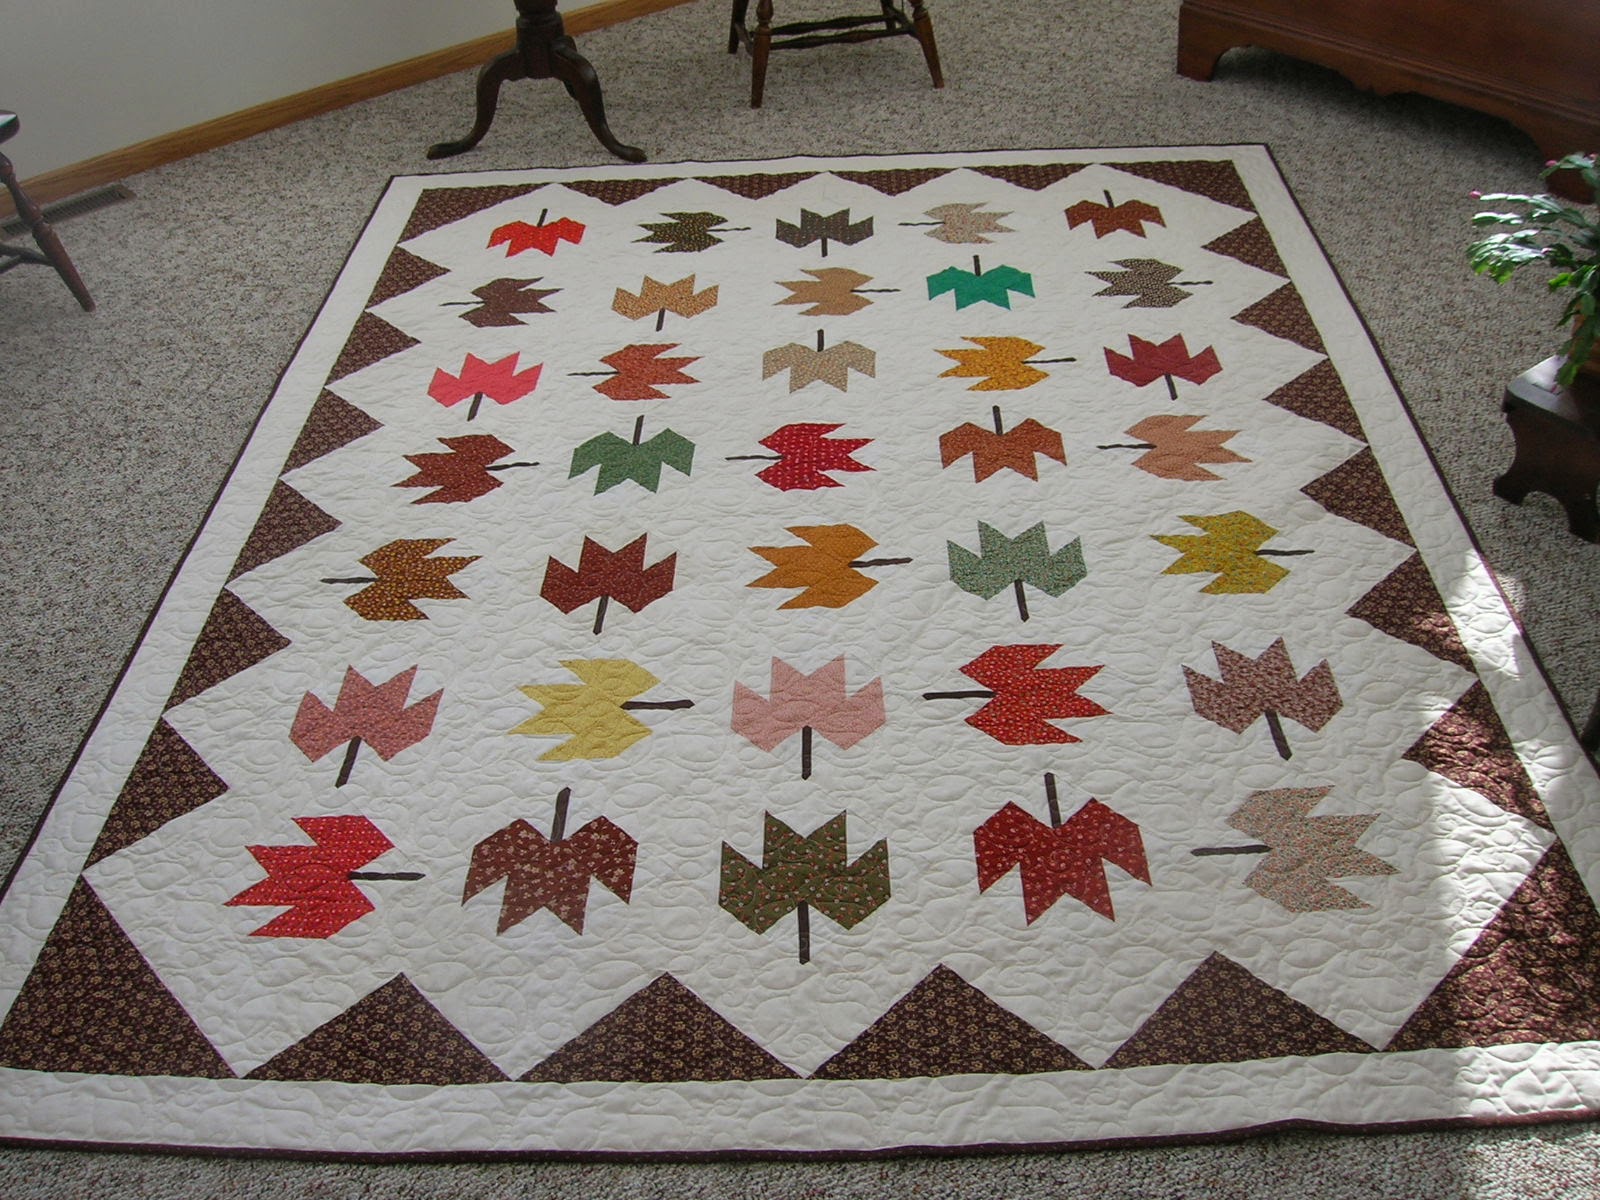
     My Maple Leaf quilt is bound and finished! I have really come to love this quilt as it grew closer to completion. 

     This quilt finished a nice size, 96" x 108", is alternated with plain blocks and set on the diagonal. The delay was in finding the right fabric for the border triangles. I am pleased with the results and will lay her on the bed soon after "show and tell" at our next Material Girls meeting.   

     I may have to post the question on the yahoo group about the quality of the older vintage calicoes from the 70's and 80's which is how old these blocks are. Remember the older VIP Cranston Prints? Some of these prints are very thin and I wonder how they will wear through time. There is an upcoming web seminar, Modern Materials: Quilts of the 1970's  which sounds very interesting.  Perhaps there will be some insight there.


     I used leftover yardage for the backing piecing two strips of muslin on each side. Now to sew on the label and mark this as my first finish for 2015!


     So it is the end of February 2015, and I have 3 flimsies and one completely finished quilt. And I will definitely be revisiting this Jelly Roll 1600 again! It really is a fun quilt that only takes a few hours to complete.


Sunday, February 15, 2015

Here, There, but Making Progress


   Another snowy day in Ohio. So cold, so pretty, and so glad we haven't had the 70 inches like they had in Boston!

This is the view out my kitchen window. And the view in my sewing room is nice too because I have been busy. 

Since I have joined the Stashbuster's challenge for 2015, my head is swimming with ideas to bust more stash. I have also been all over the place working on different projects since the first of the year (some generated by this fine group). I usually keep this number down to three projects at a time so it is time for some self control. 

 
My main goal has been to diminish my stash of juvenile fabrics. It seems that the more I cut, the more it multiplies. I think maybe one more and I'll set it aside. 

SYNCOPATION

The first is from the pattern, Syncopation. I wandered off from the directions a bit and made it my own. Working in 2.5" block sizes leaves lots of room for variations. 

The finished size is 65" x 86". The original pattern called for more blocks on the bottom but I stopped at this size. Time to move on.

DOUBLE FOUR-PATCH
 
I am sure there is a better name for this quilt. I really enjoyed working with this block arrangement and I did not use a pattern. I just cut 2.5" squares, arranged them as pictured and separated with 1.5" strips and centered with a 1.5" square. 


Four of these blocks were then joined by yellow 1.5" sashings to make blocks finish at 19". Don't you love these prints? Most of them are from Timeless Treasures. These fabrics wash so nicely and seem to soften more after each washing. I love how they handle as you work with them - not too stiff.


 And to finish I used 2.5" blue sashings with 2.5" yellow cornerstones. This quilt top has also finished at 65" x 86". And it is now ready to go with the Syncopation quilt to my long-arm quilter.


MORE WORKS IN PROGRESS

I've been swayed into  Barbara Brackman's, Stars in a Time Warp Quilt Along. Barbara posts a new colorway each Wednesday. I love her articles as they are very informative about civil war fabrics and antique dyes. I originally thought I could use these blocks in a Pheobe quilt but they are the wrong style of stars. Time will tell how far I go with this one. 
My Bonnie Hunter, Grand Illusion is cut and ready to sew. I have worked on several sections and have it all in box lids ready to grab when the mood hits. This is my fourth mystery quilt I have done of Bonnie's. She never disappoints. I might have to travel to Michigan and stay at this beautiful hotel.

This is not the best representation of the colors I chose. Just evidence that I am working on this quilt.


I love hand work and managed to complete a couple of Dear Jane blocks. These blocks have not been trimmed yet and look a bit raggedy but they will clean up nicely once I begin adding the sashes. 

This quilt has been years in the making. I would love to see this completed this year but I only have 60+ blocks done. The prep work seems to be the most work. Once pieces are cut, I am ready to go.


I have wanted to make Mabeth Oxenreider's Trail Mix quilt for a long time so it did not take a lot of coaxing during all the recent discussions about this quilt on Stashbuster's. I began my trail with the 4 patch block. I am now officially on my way! No planned color scheme. Just using up the scraps in the scrap bucket.


So it is now mid February, I have 2 tops completed and ready to be quilted. And one full size quilt ready to pick up from my long-arm quilter which will need its binding and label put on. That will surely be completed by the end of this month.

My design wall now looks bare. I have to get busy on that last kiddie print quilt top. And did I mention I picked up the April issue of American Patchwork & Quilting? Their 2015 quilt-along features a quilt by Edyta Sitar. Awesome!


Sunday, December 28, 2014

2014 is Coming to a Close...

...so I better get my last post in before the new year. I am close to my original goal of finishing 12 UnFinished Objects.  I made it to 9 and I am happy with that number.  It has been a busy year outside the sewing room.  Hopefully in 2015 I can accomplish more. 

And to help me, I recently made the commitment to join the Stashbuster's 2015 UFO Challenge. They are a fun group of quilters who offer lots of encouragement and support. And they are definitely the group to go to when your mojo needs boosting! Always motivating you to do "just one thing".

For the record, "finished" means it is quilted, the binding done, and is ready for use - or as Nancy V. says, "for proper aging".  (Love it!)

 My list of finishes for 2014:

1. El Dorado Canyon  (see January post)


2.  Summer Days - this quilt is huge - as most Thimbleberies quilts are!


3. Boston Creek Mystery - I love the fabrics! Moda of course!


4. Scrappy Nines - now hanging on my daughter's wall. This is so appropriate since her husband is color blind. The neutrals are easy on his eyes!


5. Vintage Blue Pinwheel - hand quilted


6. Lori Smith's Sampler


 7. Celtic Solstice - How many pieces??


8. Chocolate Covered Cherries - quilted with cherries and leaves. One of my favorites!


9. Kitty Korner - another favorite! Reds, blacks, yellows, greens and taupes. And just a few purples for zap!


Vintage Maple Leaves - Well actually, this is NOT a finish since it has yet to be quilted. It just needed its borders for years and I finally got them on. Half the problem was finding fabric that would go with those vintage calicoes that were so popular in the late 80's and 90's. Now it is ready for the long arm quilter and will have to be included in the 2015 count. Hopefully it will be back in my possession before I find myself Queen of the Week!


Check out those old calicos!
 
I still have a large plastic tub of these VIP fabrics that I just cannot part with. They are not like today's fabrics - a little less in quality I think - but they still charm me. I need to strip out my favorites and let the rest go! Do you have any of these still hanging out with your stash too?

--------------------------------------------------

So I finished the year with 75% of my goal met. Not including the pinwheel table topper, all were full sized quilts and 2 began from scratch. Kitty Korner and Chocolate Covered Cherries. You have to have some new projects in there too!

I spent the month of December playing Project Runway with my American Girl Doll. She was my model for making clothes for my grand-daughters this Christmas. I'll make a special post picturing all her outfits next time. That effort was so much fun!!

And I can't forget the 12 quick table runners I made for Christmas presents. They were the one hour table runners and were so addictive to make.  I'll have to make this a subject for another post with directions. 

One final share -  I was feeling really ambitious one day and cut up a box of strips into bricks for some future mindless sewing. I could almost do snow angels in the scraps. You know it was a productive day when your sewing room looks like this!


Have a happy and safe new year!