Monday, July 13, 2015

FAL Q3 Quilting Goals - 2015

I am still pushing to complete more projects begging to be finished this year. Last quarter was fairly successful, considering it was a busy time working outside. So next up are:

1. Country Bride Quilt - this is a biggie! I finished this top in 1998 for our oldest daughter's wedding. It is embarrassing to admit it still needs quilted. Just listing it here is a big step closer to getting it done. 

All the appliques are done by hand and I later trimmed the background away to reduce bulk as I want this one hand quilted. I have the quilt lines are traced lightly on the top - it is just getting it sandwiched and quilted that has me stuck! It is quite big - another reason I have stalled. I am considering taking it to my long-arm machine quilter and have her baste it for me. I can then put it on the frame and go for it! How long do you think it will take?


2. Triple Four-Patch - a carry over from last quarter. It is at the long-arm machine quilter's so I can at least count this one done by the end of next month...Actually I think I remember her saying it won't be ready until October. Maybe I'll get lucky and it will come back to me before the deadline so I am counting it here!


3. Twirly Triangles just got a new look which I have now titled, "Not a Cross Word".  I'll add an updated photo once it is completed - this one is another carry over from last quarter. (proving I have not given up!) I love these new simple designs that lend themselves to so many different settings and arrangements, don't you?


4. Syncopation - This was a fun quilt that began with a pattern and then I just started improvising because of the size. I was really trying to bust my stash of juvenile fabrics with this one and I STILL have enough to probably make one or two more! The top is finished but it still needs quilted. Hopefully this one WILL be completed by the end of September.


5. Jelly Roll Race Quilt - This top is all basted to its backing and batting. I am presently taking a class at the local quilt shop on machine quilting using my domestic sewing machine. All I need is a little confidence and a bit more practice and I plan to tackle this one myself.

For the batting I used strips leftover from previous quilts. I fused them together using very lightweight interfacing and I am rejoicing in my "free" batting! You can read more about how I did this on this posting.


6. Table-runners - I have a few of these all basted and ready to quilt the layers together. These might make nice gift ideas this Christmas. 


This topper is all quilted and ready for the binding. I am stalling because I am unsure how to miter those corners. Another challenge to overcome. 

Am I seeing a pattern here? My UFO's all meet at the same place - where I get stuck!  How do you break through your "sticking places"? 


A half-hexagon block made from a pack of 5" charms. It is all basted but not quilted yet. I love these little projects and try to have a few by my chair so in the evenings I have some busy work all ready. I notice here too that I will have those awkward angles on the outside edges. Yikes! 


And this one's quilting is just about finished and will be ready for its binding to be applied. Compared to the above mentioned, this one will be an easy finish. 

The four outside corners have not been quilted yet - perhaps I will remove them after seeing it pictured here. 
 
 I find hand quilting can sometimes be addictive. I like to fill in the areas so I tend to add a few more rows or lines of stitches. Being a table runner where it can be easily scrutinized, I want it to lie flat. 

So there is my plan. I would LOVE to have all 8 finished by the end of this quarter. Let us keep doing that "just one thing"! Even if it is only 5 minutes a day. It all adds up to a completion!


Tuesday, June 23, 2015

Breaking the Rules

There are always lessons to be learned and wishes for doing things differently afterwards - even in the quilting world. This quilt project forced me to break some rules in order to get it done.Two very important rules:
  1. Make sure you have enough fabric to finish the quilt as directed on the pattern!
Yeah, I missed that one. I loved the large print I chose for this quilt and used fabrics that coordinated nicely...except I did not have enough of the large print fabric! I went ahead anyway with the hopes I could squeeze and conserve the fabric to make it stretch. It did not, so I had to use a close match as an alternative in the sashings. If you look closely, you may notice the center pieces are just a little off. 

 2. Make sure you have enough fabric to finish the quilt AND use 100% cotton fabrics only.


Not only was the large print fabric short, but I also ran short on the green solid. I guess I could have used the alternative fabric I mentioned above for the binding but I was really stuck on the solid green.

Do you know how hard it is to find an exact match of a solid color of fabric? The closest I could come up with was a polyester-cotton blend. Ugh! There is a big difference in handling this type of fabric but I got through it and am satisfied that it is now completed. 

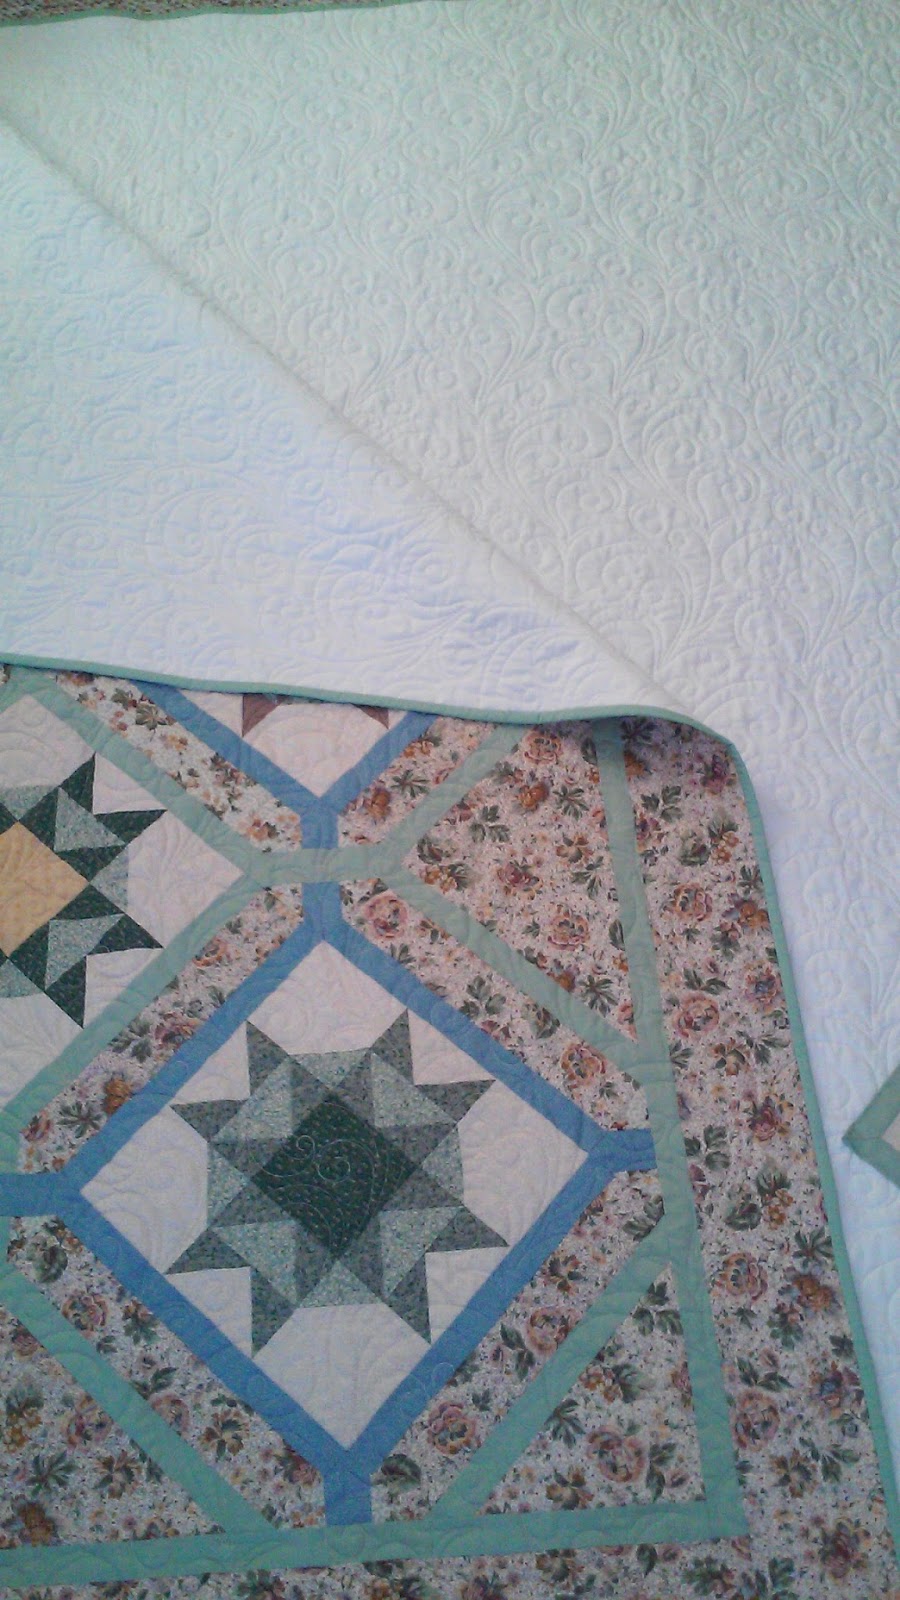
Here, she is hanging on the design wall ready to be sent out to my long-arm quilter. I chose a soft white backing that is so smooth and soft. 100% cotton, of course. "The touch, the feel, the fabric of our lives" Do you remember that jingle for cotton?


 Her finish with binding on. 


 And a couple of pictures showing the quilting design. 


 I love the swirls!


She is all ready to be shelved away for Abby. It had to be hers. The pattern name is Abby's Wish and you can find the pattern in BH&G Sampler Quilts, 2002.

Another finish in 2015. I can check off number 2 on my Finish A-long list. 


Monday, June 1, 2015

Another Finish!

Gideon's Quilt began as a Jelly Roll Race quilt except I used my own cut strips from juvenile prints in my stash. 


I was unhappy with the final result so I cut it into crosswise strips. See previous post for a further explanation.  


It is now quilted, the binding is on, and the label sewn on the back. Count this another finish for 2015 and check off number 1 on my Finish Along list! 


It finishes at 71" x 90" with a perimeter of 322 inches. I even pieced the backing with some yardage I had, so I busted my stash from 10.75 yards of fabrics.


I hope our happy warrior has many adventurous dreams under his new quilt!


.

Friday, May 29, 2015

Experimenting with Mulch

 Shredded Newspaper and Peat Moss Mulch

It is always fun to try new ideas and techniques in the garden. I remember years ago I tried this when we lived in our century home and the following year the garden soil was like sifted flour.   I would only use this on the flower beds because I am using shredded paper and I don't want the ink leaching into the vegetables I will ingest. Be aware that  this will also acidify your soil.

So I begin by double digging the areas between the plants to break up the soil and kill any weeds. A little dose of bone meal and Epsom salts worked in helps too.The plants really like this aerating the soil around their roots and it also helps pulling weeds later on because the soil is not compacted. I only do this once a year because it is such a back breaking job. I tend to have a lot of refuse from the previous year's garden (dead stalks, etc. from the perennials) so while digging I often "cheat" and bury all that below ground level. It is all clean organic matter. ALL weeds are removed and disposed of. I never turn weeds over in the garden because they will re-root or re-seed themselves. 

It is hard to hold a watering can and a camera at the same time
Once the soil is worked fine I lay a layer of shredded paper over the entire area to be mulched. It is a good idea not to do this on a windy day! I saved shreds from our paper shredder all year just for this job. All those credit card applications, junk mail, and old receipts are now worm fodder. That somehow feels really good.

Now this is the important part. Water and saturate the paper completely before laying the peat moss down. If you would mulch using peat moss only it would become compact once it dries and it becomes a thick barrier that water can not easily penetrate. So you totally saturate the shredded paper under the peat moss layer, and this in turn keeps the peat moss moist and pliable.  

Once all the paper is wet, lay a two inch layer of peat moss over the paper. I pat it down to even out the lumps and give it another light watering. The wet paper will remain damp laying over the soil under the peat moss and will keep it pliable. The plants will like this moisture retaining treatment too!


This area is now finished and ready for the growing season. I am anxious to see the results to all this. I typically use dried grass clippings for mulch but after it dries out in the beds it really doesn't look that great. And it will compact itself down so that the rain water has a hard time seeping through. It will heat up so you need to be careful not to put it too close to tree trunks. And it must be put down in repeated layers or it will mold so it has its pros and cons. 

My climbing roses were bit this year from the hard winter we had. I trimmed off the dead canes and it is rejuvenating nicely. Unfortunately there will be no blooms this year.  

Does anyone have any idea what you can do with those old rose canes? I usually just chop them up and throw them away. I don't want to bury them because next year when I double dig they will still have the potential for being man eaters! They don't break down like other twigs.

I braided and tied down the spent daffodils. They can begin to look unkempt so this tidy's them up until they turn brown and I bury them. 


The next site I worked on I ran out of paper clippings so I shredded some newspapers and used them instead. Ewww what a mess! But it works - honest.


Again, I completely wet it down and covered with peat moss. Now this area is ready for a fairy or two to visit. Can't you imagine them sitting on top of the flowering onions and playing hide and seek with those hiding behind the lolly-pop tree?

A few Johnny Jump-ups to be transplanted here and it will be complete. I'll need my little assistants, "Olive Heartfly" and "Buttercup Pepperwand" to help arrange things. They have a special wonder with fairies. Did you know that fairies are born when a baby laughs? 


I worked the other side to this L shaped garden but did not take any more photos. I divided the Stella Dora daylilies and the Lady's Mantle. And the Asclepias incarnata 'Ice Ballet' or Swamp Milkweed was dug up and will be moved to the back garden. Asclepias are easy to grow perennials that are drought tolerant and attract butterflies. Every garden should have some.

My UFO Challenge is still calling me from the sewing room. I hope to be there soon. I am nearing another finish once the binding is completely applied and sewn down.


.

Monday, May 18, 2015

Discouraging news

We were wondering why our Corylus avellena 'Contorta' (corkscrew hazelnut, or Harry Lauder's Walking Stick) was not leafing out this spring.
We had a hard and cold winter this past year and at first we thought that was the cause, but when we looked closer we found all these cankers. They are covering 70 - 80% of the plant so I am afraid it must come down. 

I will definitely be looking for a replacement. I love the silhouette of these shrubs. Especially in winter when the knarly branches are so showy in the snow. 

This was an especially nice plant because all the years we had it, it never grew up any suckers. 


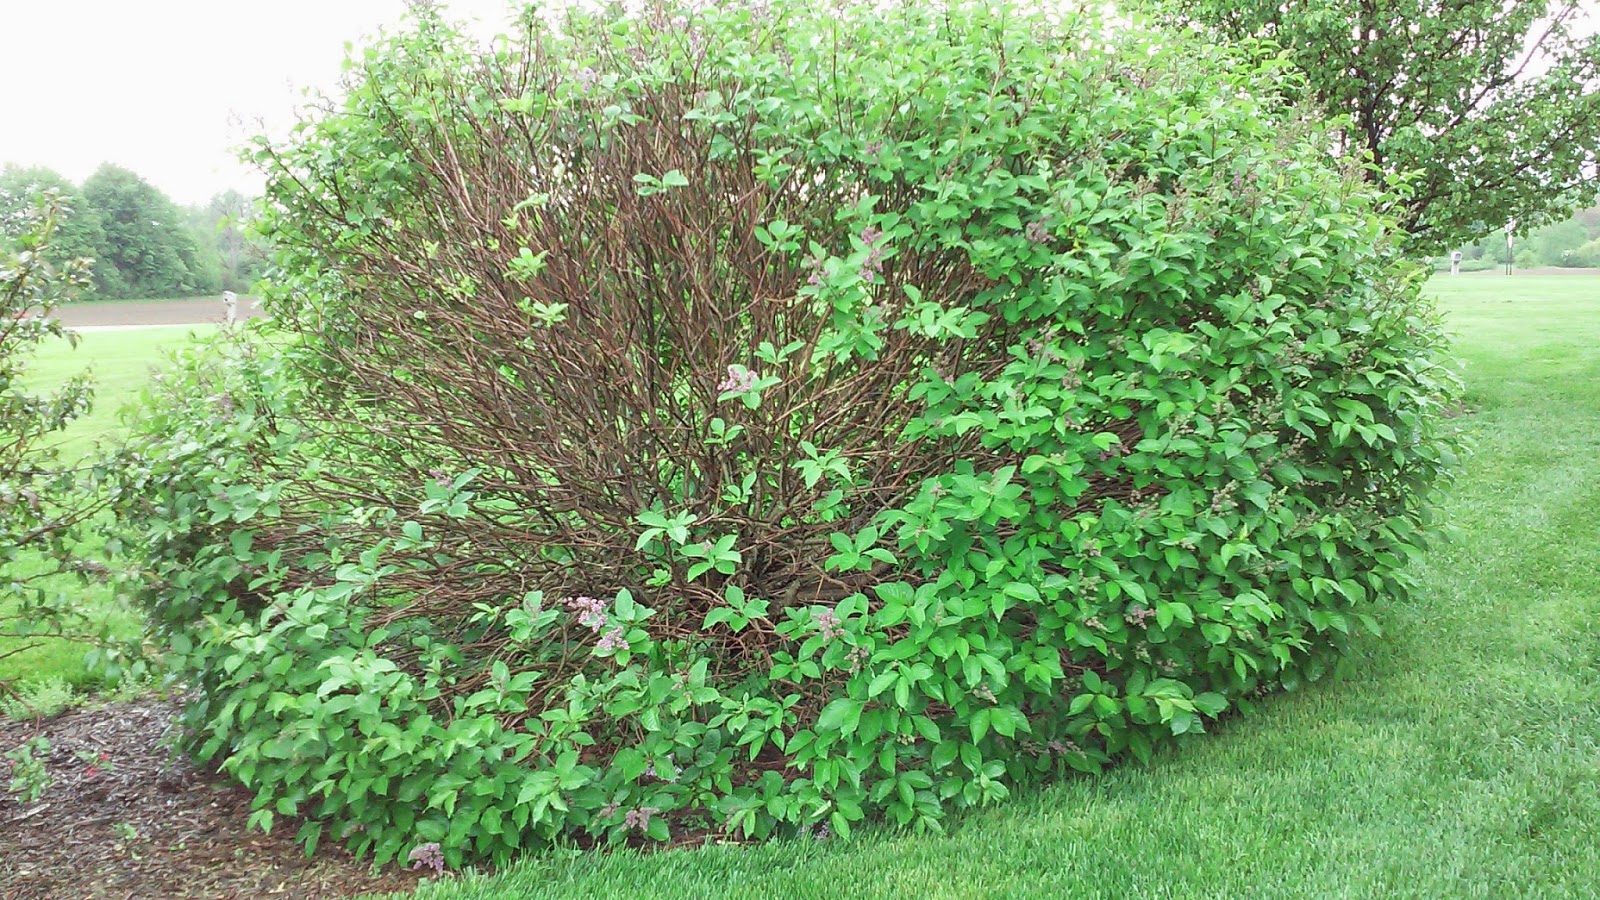
Another shrub that is giving me grief is my Korean Lilac. She has grown to be 8 foot tall and nearly 10 feet wide but an area on one side is dying off. 

I'll have to prune this out with the hopes that it will come back. She is nearly 12 years old and was given to me on Mother's Day by our daughter.


The asparagus bed is producing nicely. We are cutting nearly every day. And because we all love this vegetable none goes to waste!

Look at all those nubs! We have already cut a lot and more keep coming up - overnight it seems. Included there is a second year parsley plant that will go to seed this year (biannual). In the fall we will top dress this bed with compost to ensure a good crop again next year.

A fresh batch all washed and trimmed - ready to eat. I do not peel my asparagus. It is so tender it is really not needed. I just steam them until tender and enjoy with butter. So easy, healthy and free!!


My False Indigo is doing well again this year. I had to cut some of it out because it became so big last year it grew over the edging and killed the grass. I like to keep an "air barrier" between the house and the shrubs also. 

She is beginning to bloom already and will continue to bloom for another 5-6 weeks. The seed pods are really pretty too and can be used in dried arrangements. I'll have to pinterest this for some unique ideas. 

False Indigo is of the genus Baptisia and all parts of this plant  is poisonous. It is really an easy plant to grow once it is established. It does not like to be transplanted so find a spot for it and leave it alone. It will last for decades.
You can see from last year's picture how big this plant can get. It was quite a fight to cut out some of its roots so hopefully it will behave a for a few years before it needs to be thinned out again!

It reseeds itself also so I have to keep those in check. Overall this plant is so pretty the entire growing season that it is worth the effort. The stalks die off in late fall and makes its own mulch for the winter.


I have not had the chance to weed the corner perennial bed yet. The flowering onions, Johnson Blue geraniums, and creeping phlox are all in bloom. Soon the Japanese Iris and peonies will be blooming. 

I am anxious to explore and see what may have seeded from last year. I am sure I will find some cosmos and zinnias. 

The roses got bit over the winter too. All new stalks are growing so there will be no flowers or hips this year but I am glad they did not die from the cold. We should have covered them.

The apple trees have been pruned and sprayed, the garden is tilled and ready to plant, the side and back beds have been mulched, the yews and burning bushes have been cut back. I've been busy and hope to catch up soon so I can get back in the sewing room! 


I love the way the raindrops rest on the velvety leaves of Lady's Mantle. I believe there are fine hairs on the leaves that allow it to hold droplets of water. It is a very carefree plant that self seeds so I often have extras to give away. It flowers tiny chartreuse flowers and makes a nice companion to roses and daylilies but mine just grow wherever they pop up.


May is a busy month here in Zone 5.  It cuts into my sewing time but I love working outdoors in the fresh air, don't you? 

I'll have a finish to report soon though. Not all time has been spent outdoors. 


Monday, April 13, 2015

FAL Q2 Quilting Goals - 2015

We are in the second quarter of the year, 2015 - already! Since January, I have been busy and because of a long, cold winter, I was able to complete 6 tops and one quilt that is completely finished. Now to set my goals for this quarter my list is as follows:


1. Gideon's Chinese Coins Quilt has been sent to the machine quilter's so once it makes it back home I'll get the label on and the binding attached. So anxious to see this done. It began as a Jelly Roll Race quilt but I was not happy with the end result. I cut it into lengthwise rows and came up with the picture below. Our little happy warrior, Gideon, will love it! The prints are snakes and trucks and all things little boys love.


2. Abby's Wish has been sitting unfinished for too long. I was short on the sashing fabric and was waiting for the solution to drop from the sky but it never did. I've decided to follow the saying by Brenda Papadakis, "better finished than perfect" so a few sashes were made from an alternative fabric and I hope to have this quilted and done. All the blocks have been completed since 2002! That is 13 years ago! Really? Life is a blur... Hopefully I can squeak out enough of the solid green for the binding.


3. Jelly Roll Race Quilt is basted and ready to begin quilting. I will do the machine quilting on this once I decide on a quilt design.


4. Grand Illusion is still in pieced units but I keep plugging away when I am in the mood for repetition sewing at the machine. This is my 4th mystery quilt with Bonnie Hunter. I have attended her workshops and she is a sweet and encouraging teacher. I've always loved scrap quilts so she talks my love language.


5. Twirly Triangles is really a leftover of bonus HSTs from another project. I am waiting for more background that I ordered online and I will be back to getting this completed. Moda's solids are dreamy fabrics with such beautiful sheen and drape it is hard to believe they are cottons. I played around in Electric Quilt (I have the older v5) and came up with a nice setting for these. That is what's keeping me motivated. 


6. Susan McCombs Medallion has been giving me grief as I work to make everything fit. I contacted Susan recently and she was very kind and helpful in getting me unstuck. I am nearly ready to attach the Lemoyne Star block borders. All these are hand-pieced. Medallion quilts can be challenging - at least this has been for me.


7. Triple 4-Patch is a top ready for quilting. I don't know if I will find the time this quarter to finish it but I am going to try. I love this simple pattern and may try to make another. Have you seen the tiny version of this by Mary Elizabeth Kinch? This is definitely on my bucket list!


Well, that is quite a variety of things to work on for now (truthfully - I have about 30 more projects on the shelf). Gardening season is fast approaching and I will be splitting my time between the two with "The Garden" taking priority (because I hate working in hot weather). "The Garden" includes the vegetables, and the orchard, and the flower beds, and the mulched beds around the house...pretty much the whole homestead is considered The Garden at our house.  

Now to hop on over to On the Windy Side to see what others have put on their to-do lists.  I am so thankful to Adrianne for hosting this event and sharing her blog! You can follow her too for more inspiration and tutorials! 


2015 FAL at On the Windy Side


Tuesday, March 31, 2015

Pushing Hard Towards Spring


Another Jelly Roll Race - 

Sometimes it is fun to get off the "to-do list" and try something just for fun. I tried the Jelly Roll Race Quilt again with better results this time. I found a bin of neutral strips I had stashed away and brought those out with a few added red and brown(ish) squares. It took me a little over 3 hours but I have to add an extra day to cut and piece the borders I added.


This quilt is quite heavy for its size. I am using a plain muslin backing and pieced batting pieces (see previous post). It is all basted together and ready to be machine quilted...by me. I have only done one small baby quilt on my Domestic Sewing Machine so this will be an adventure!


Abby's Wish - 

Another unfinished quilt that has been stored away since beginning it in 2002. This pattern was taken from BH&G American Patchwork & Quilting Magazine's, Quilt Sampler 2002. 


I had all the blocks completed but never got them joined together. I was really, really skimping on the sashing and border fabric! That is where I got stuck and why I put it in the closet until now.  I barely got by, and if you look very closely, you can see where I added an alternative fabric that is a close match. The lesson here is to be sure you have enough border fabric before you start! Ugh! This was painful, but it is now assembled and has been taken to my Machine Quilter. I can't wait to see it come back and I'll put the binding on so I can claim another finish.

This makes the 7th quilt top finished this year...but it is not a quilt until it is quilted so...well, you know!

Spring is in the air! Things will slow down in the sewing room soon as we get busy outdoors. It is a thrill to get my hands dirty and smell that fresh earth scent!!

Happy stitching!